
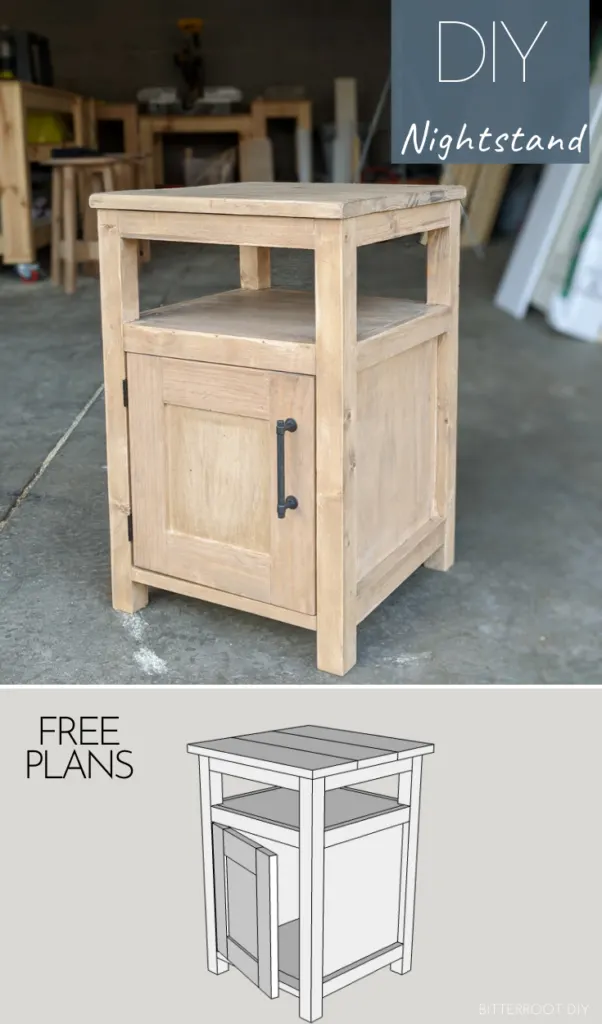
Build a shaker style DIY end table with these free plans and tutorial.
Head to my new YouTube channel for the full video on how I put this DIY end table together. And don’t forget to SUBSCRIBE while you’re there to see lots more how-to videos.

Build two frames as shown below.
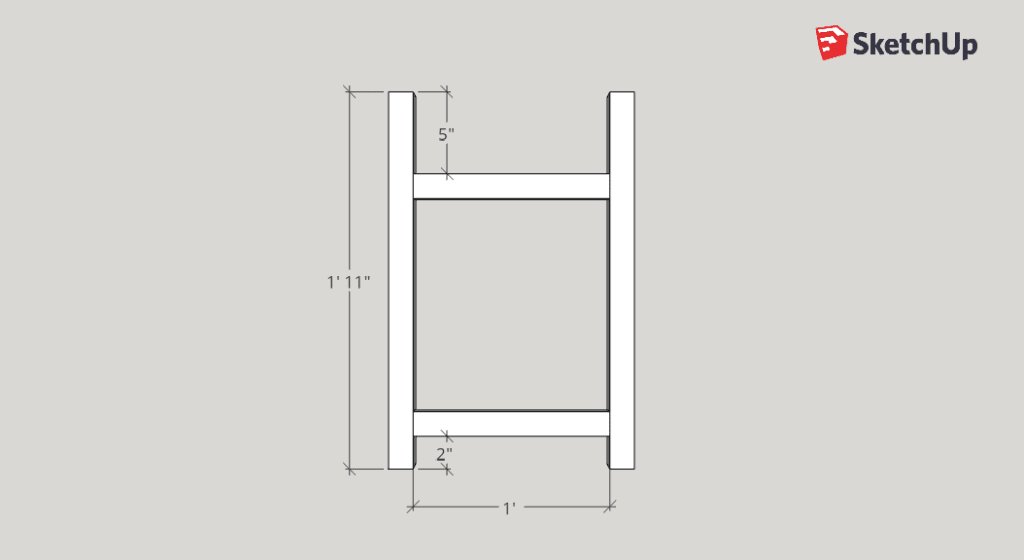
Use wood glue and two 1 1/4″ pocket hole screws on each end of the 1x2s to attach them to the legs. Position the 1x2s so they’re flush with the outside of the legs and face the pocket holes toward the inside to best hide them.
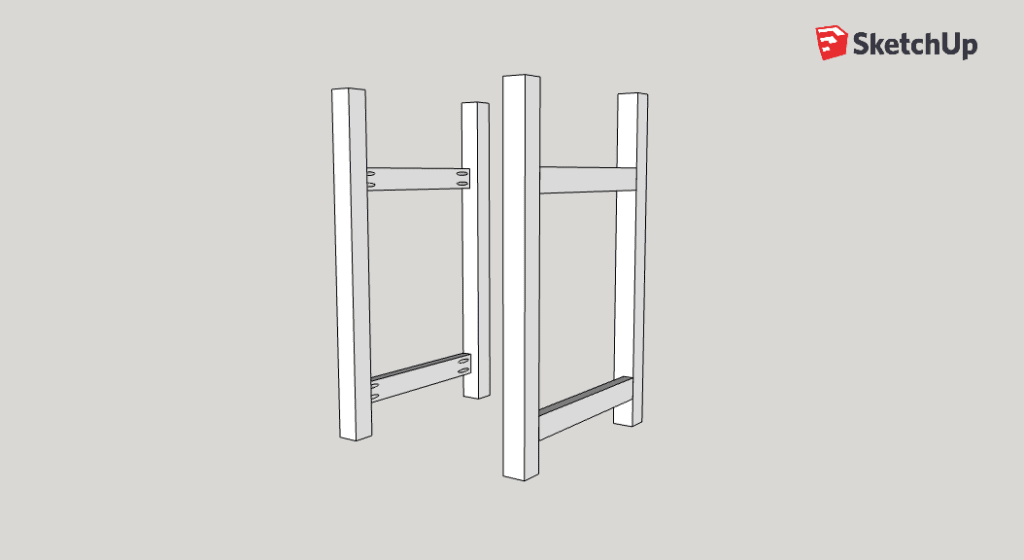
Join both frames together with 1x2s in the front and back. Again, position the 1x2s flush with the outside of the legs and face the pocket holes toward the inside of the frame to best hide them. Use wood glue and two 1 1/4″ pocket hole screws on each end of the 1x2s.

Don’t forget to flip that bottom front 1×2 horizontal! It will be part of the bottom shelf when you put the plywood in place. Line the bottom of it up with the bottom of the rest of the 1x2s (2″ up from the ground).
Attach the 3/4″ plywood sides and back. Line the plywood panels up so they are flush with the bottom of the 1x2s and attach with wood glue and 1 1/4″ finish nails.
If you don’t own a brad nailer, you can use screws (or a hammer and nails). I just used brad nails and wood glue since the panels aren’t structural for the frame – they just close it in.
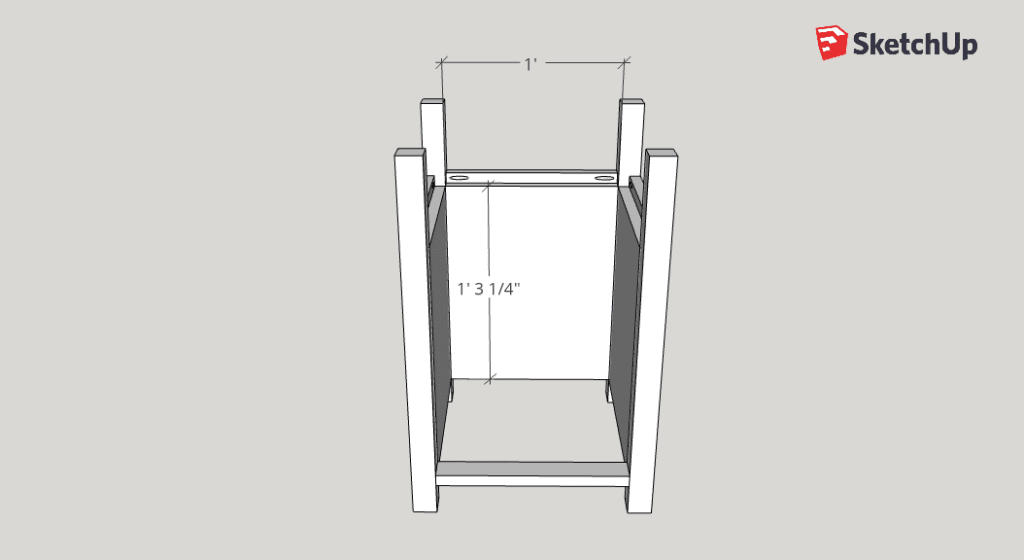
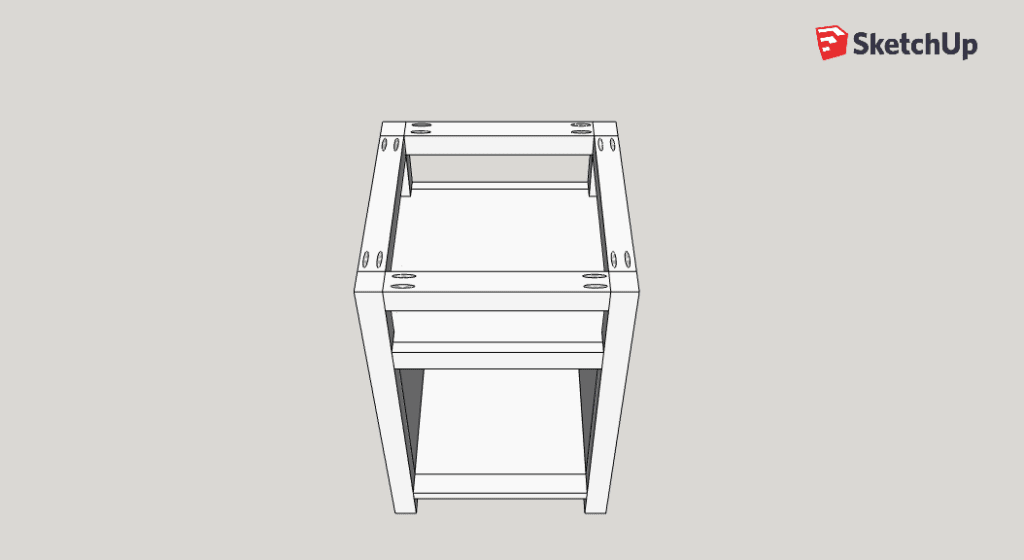
When the plywood is lined up with the bottom of the frame 1x2s, there should be 3/4″ exposed along the top of each of those top 1x2s.
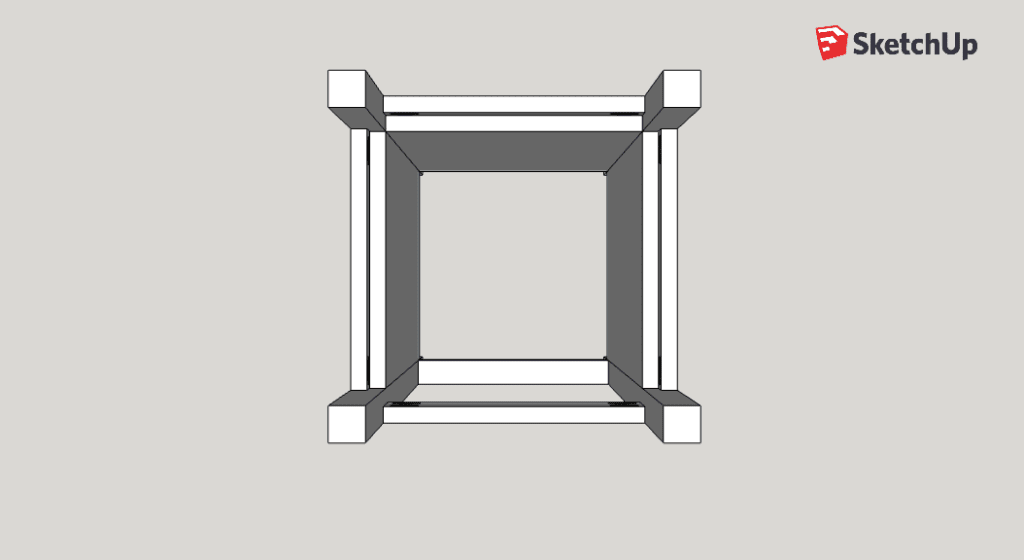
Here’s a top view:
And from the side:

Next, put the bottom shelf in place.

Use wood glue and 1 1/4″ pocket hole screws to attach it to the frame.
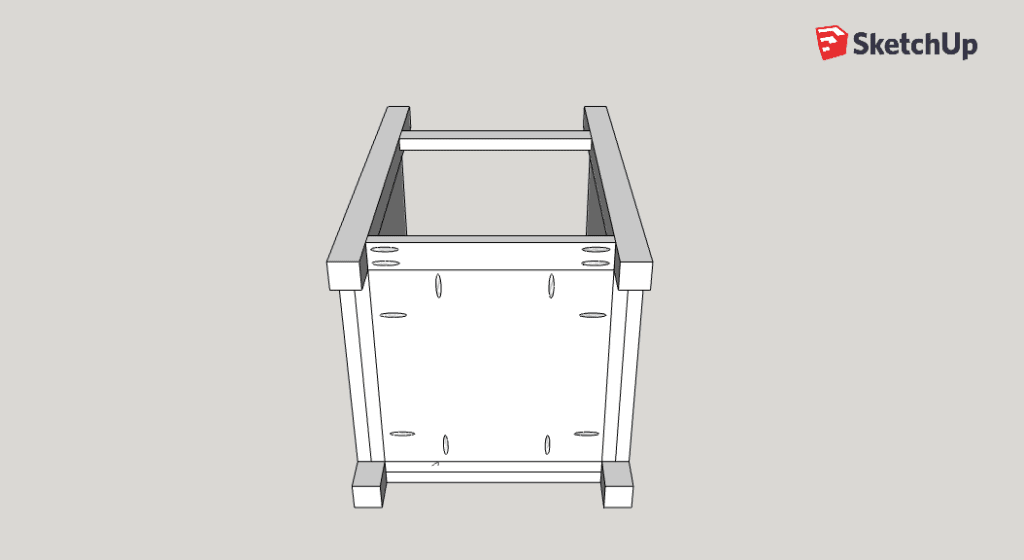
Apply wood glue to the tops of the 3/4″ plywood side panels and put the top shelf in place. It should slide in and sit on top of those plywood panels like this:
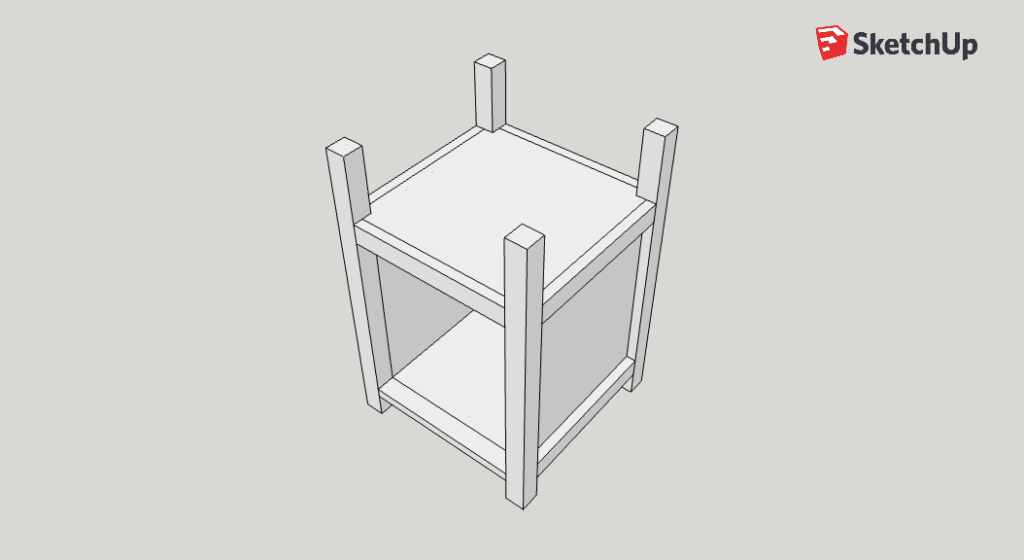
Once the top shelf is in place, attach the top 2x2s to complete the frame with wood glue and two 2 1/2″ pocket hole screws on each end.
Originally, I built the entire frame and then tried to put the top shelf in … guess how well that worked haha! This order of assembly should work much better for you!
So that’s it for the DIY end table base. Next up – the cabinet door and tabletop.
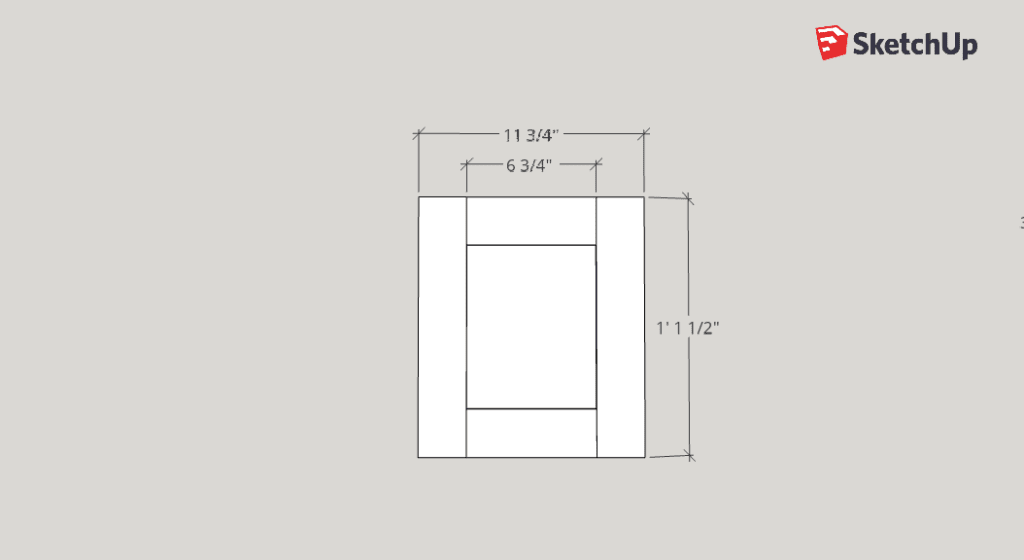
I went with a shaker style cabinet door for this end table. I wrote a whole separate post on my go-to method to build shaker style cabinet doors, but there are a million ways to do it. If you’re an experienced woodworker, feel free to build it as you see fit. If you’re interested in how I did it, see my post on how to build shaker cabinet doors.
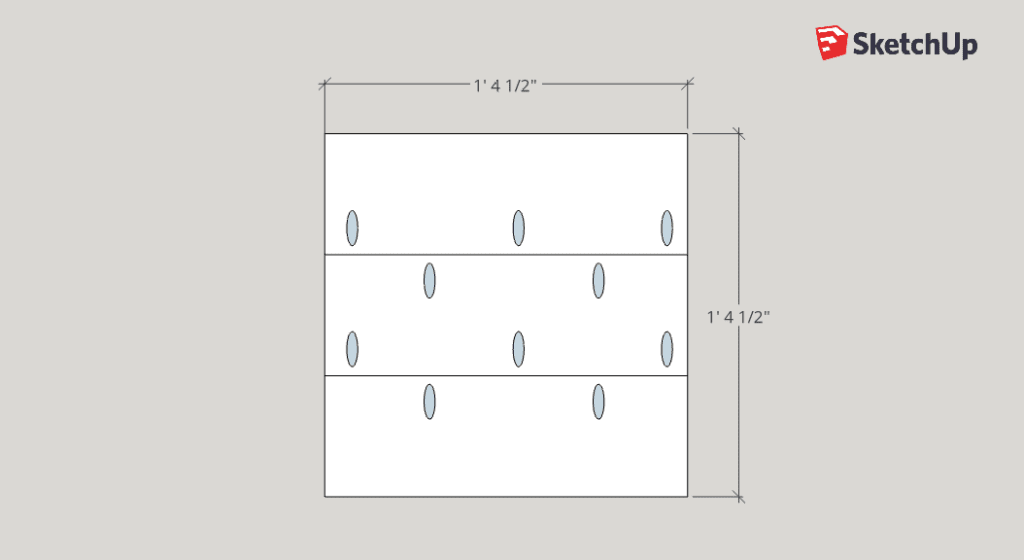
Here are the dimensions for the door to fit this end table:
Put the tabletop boards together with wood glue and 1 1/4″ pocket hole screws. I stagger the pocket holes in opposite directions for a good joint along the length of the tabletop.
For more information, see my post on how to build a tabletop.
I recommend sanding and staining the end table before you attach the door and tabletop so you don’t have to work around as many corners.
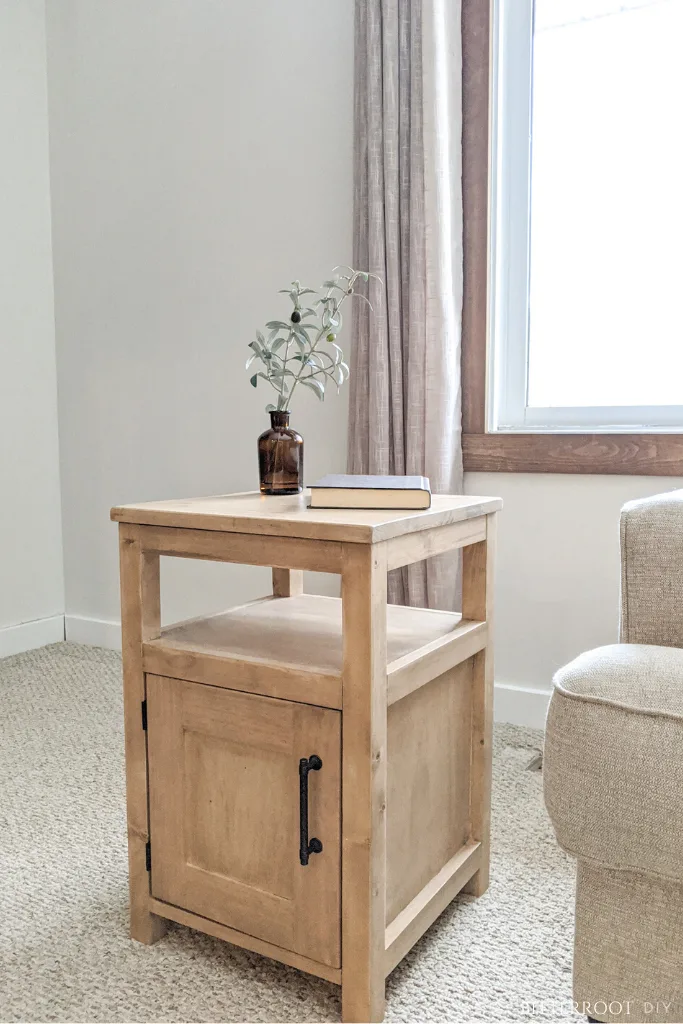
I stained this DIY end table with my latest favorite stain combination – pre stain, white wash pickling, and early american – then sealed it with glossy water based polyurethane.
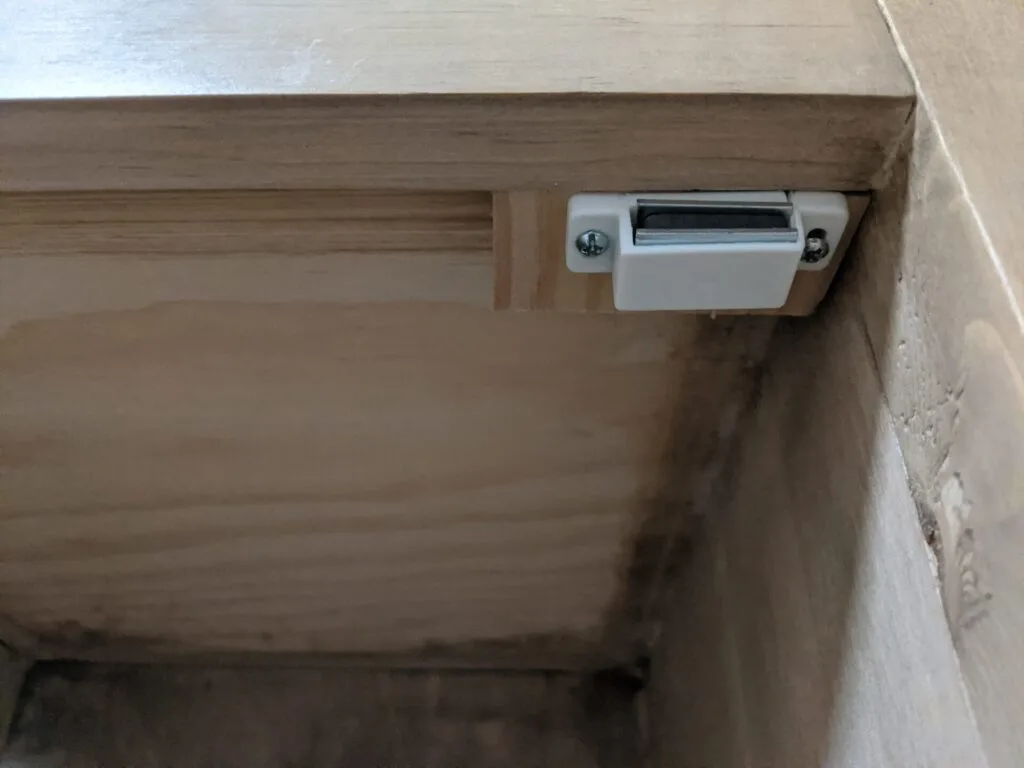
Attach the cabinet door with 2″ butt hinges and install a small magnetic door catch behind the front frame to stop the door flush with the frame when it closes. I used a small scrap 1×2 as a block to attach the magnetic catch.
Finish the door off with a knob or pull of your choice. I used a 4″ soft iron handle to match the rest of the cabinets in our house.
Lastly, attach the tabletop to the base. You can screw directly through the top 2x2s into the bottom of the tabletop, but you’ll have to go at a slight angle since a standard size drill won’t fit between the top shelf and tabletop.
I used small 3/4″ corner braces and attached them to the bottom of the tabletop first, then put it in place on the frame and screwed them to the top 2×2 frame. I wouldn’t recommend this method since it was such a pain to get the corner braces positioned correctly, but that’s what I did!
Honestly, this would be a great time to use one of those nifty right angle drill attachments. I seriously just ordered it after building this table haha!
Please let me know if you have any questions on this DIY end table and I’ll get back to you as soon as possible!

Thanks for stopping by!
For more project ideas, you can find me on Pinterest. And to stay up to date with the latest shenanigans, follow me on Instagram.